
I. Account Registration & Configuration
1. Account Registration
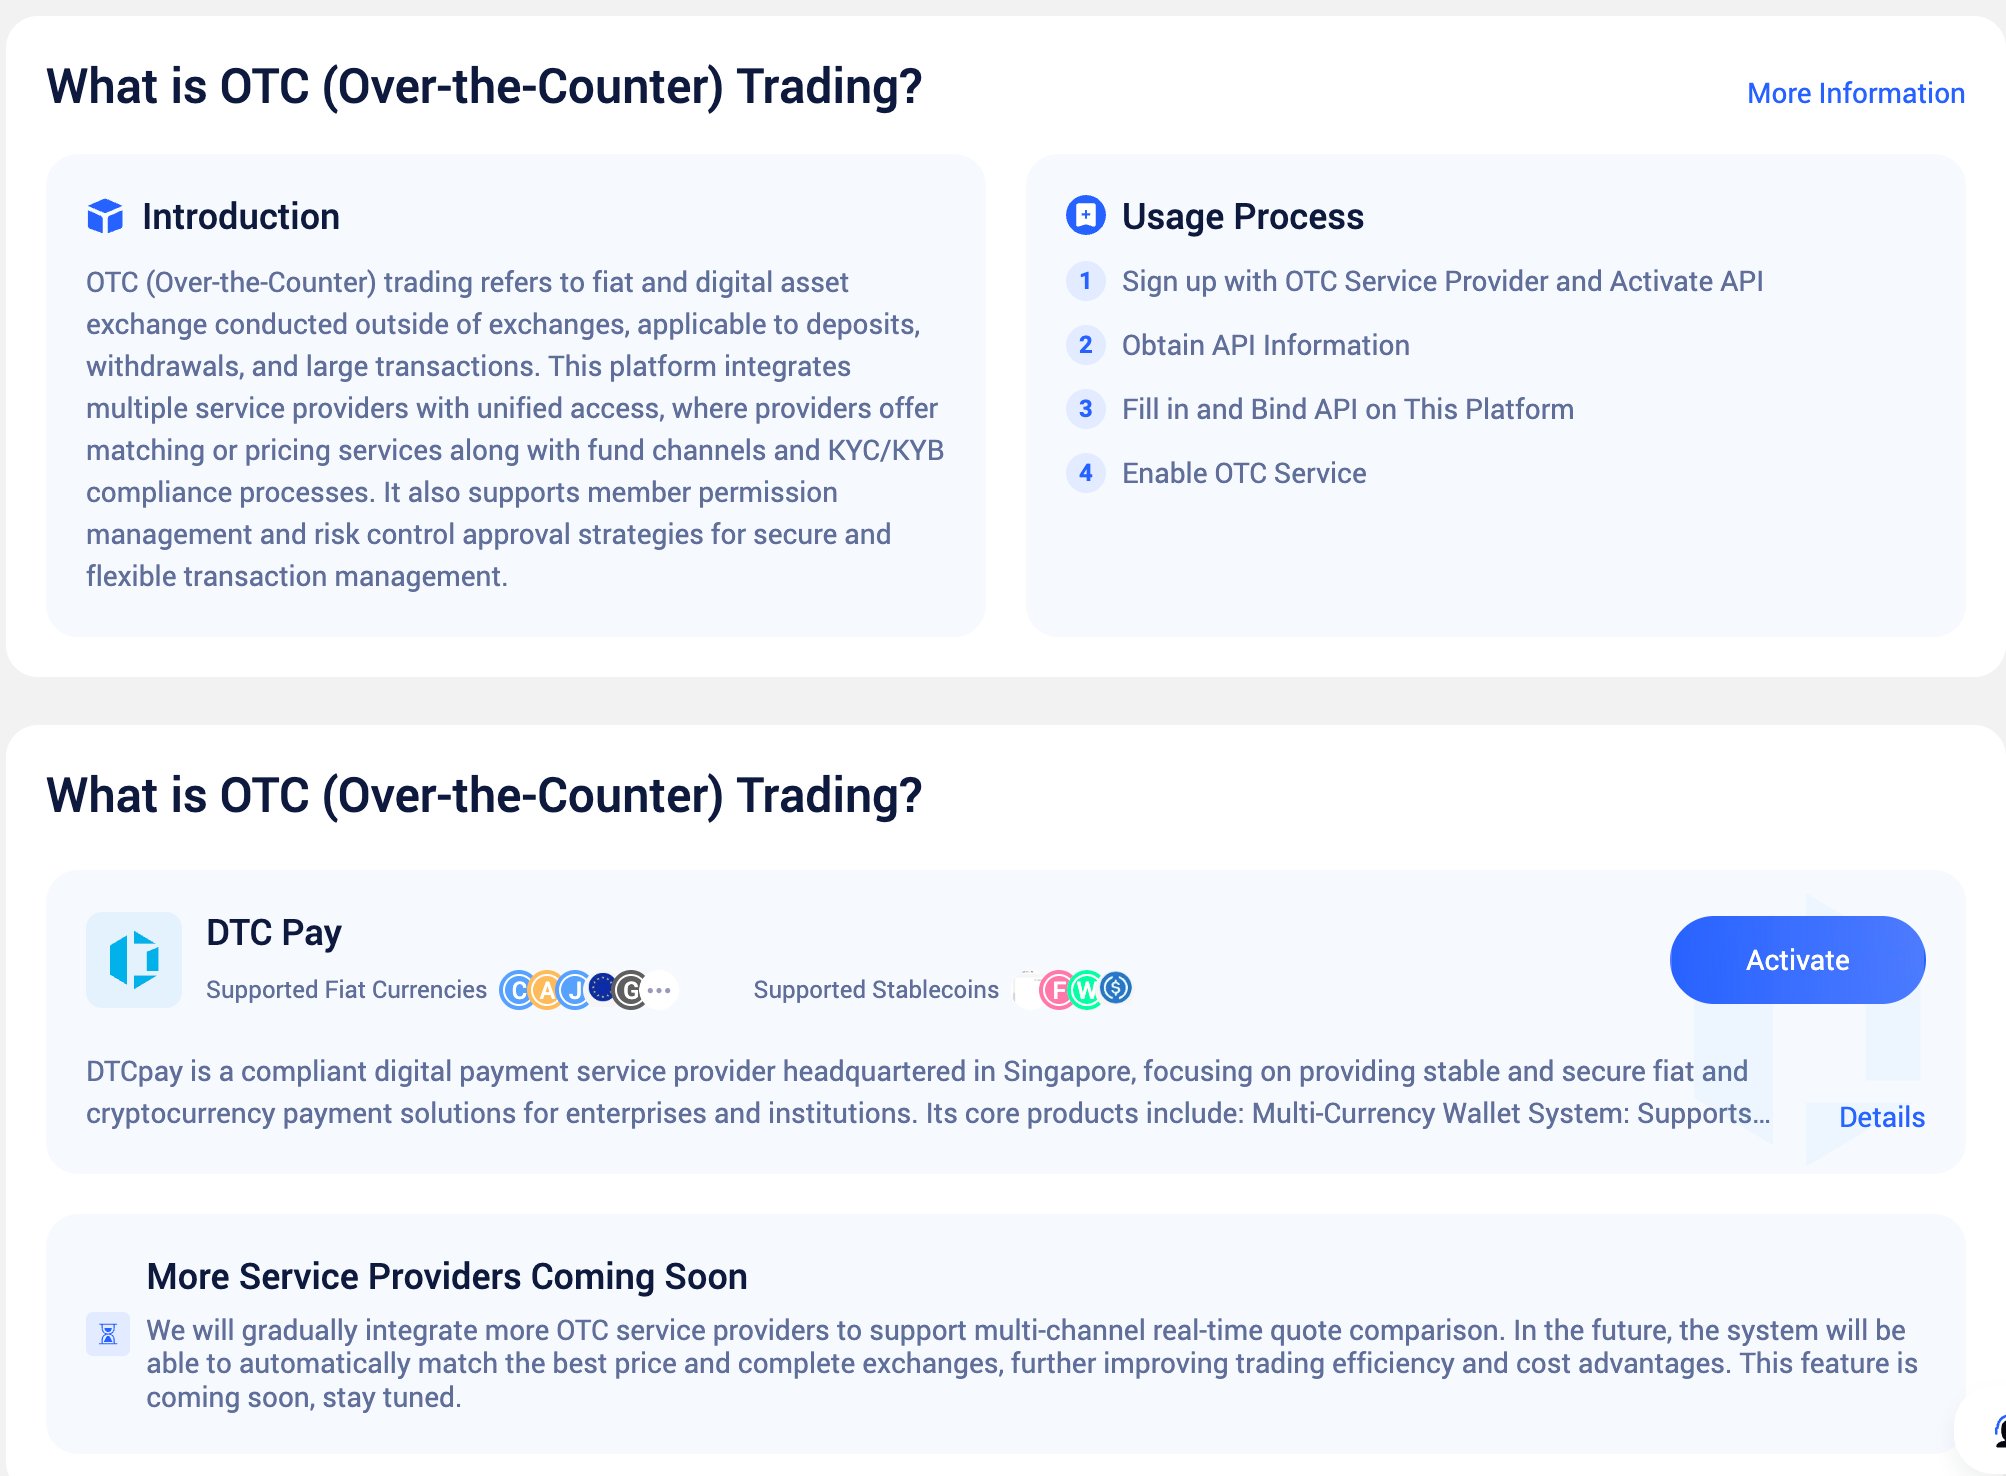
We work with DtcPay through an API integration model. You need to first complete merchant registration on DtcPay and obtain the corresponding API credentials. Once configured, you can access DtcPay’s full OTC capabilities within this system while utilizing our various featured functions for more efficient business operations. Registration: If you choose DtcPay — a licensed and compliant OTC service provider — you must first create an account on the DtcPay platform. You can contact our platform’s customer service for registration guidance and assistance to simplify integration and shorten onboarding time, or you can contact DtcPay directly to complete the registration process on your own. If you already have a DtcPay account, you can proceed directly to add and configure the account within this system.2. System Configuration
1
Obtain Platform Credentials
On this platform’s OTC page, click the “Activate” button. The system will automatically generate the following information (available for direct copy):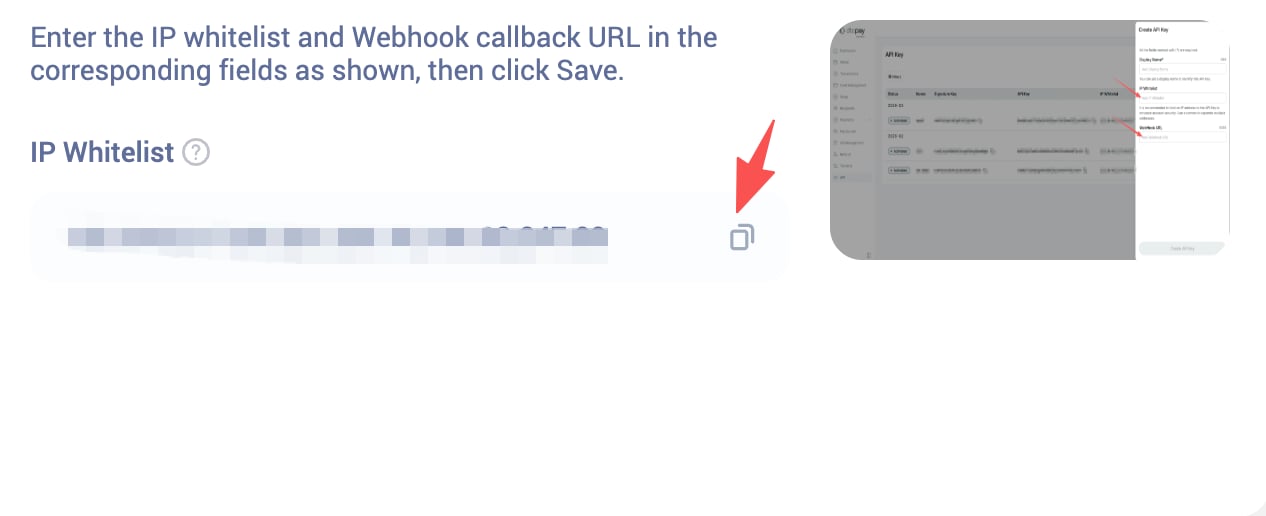
- IP Whitelist Address: Used to authorize this system’s server access in the DtcPay dashboard
2
Create API in DtcPay Dashboard
Log in to the DtcPay admin dashboard, navigate to the API Management page, click “Create”, and fill in the IP whitelist address obtained in the previous step to create an API.Upon successful creation, the system will generate three key parameters: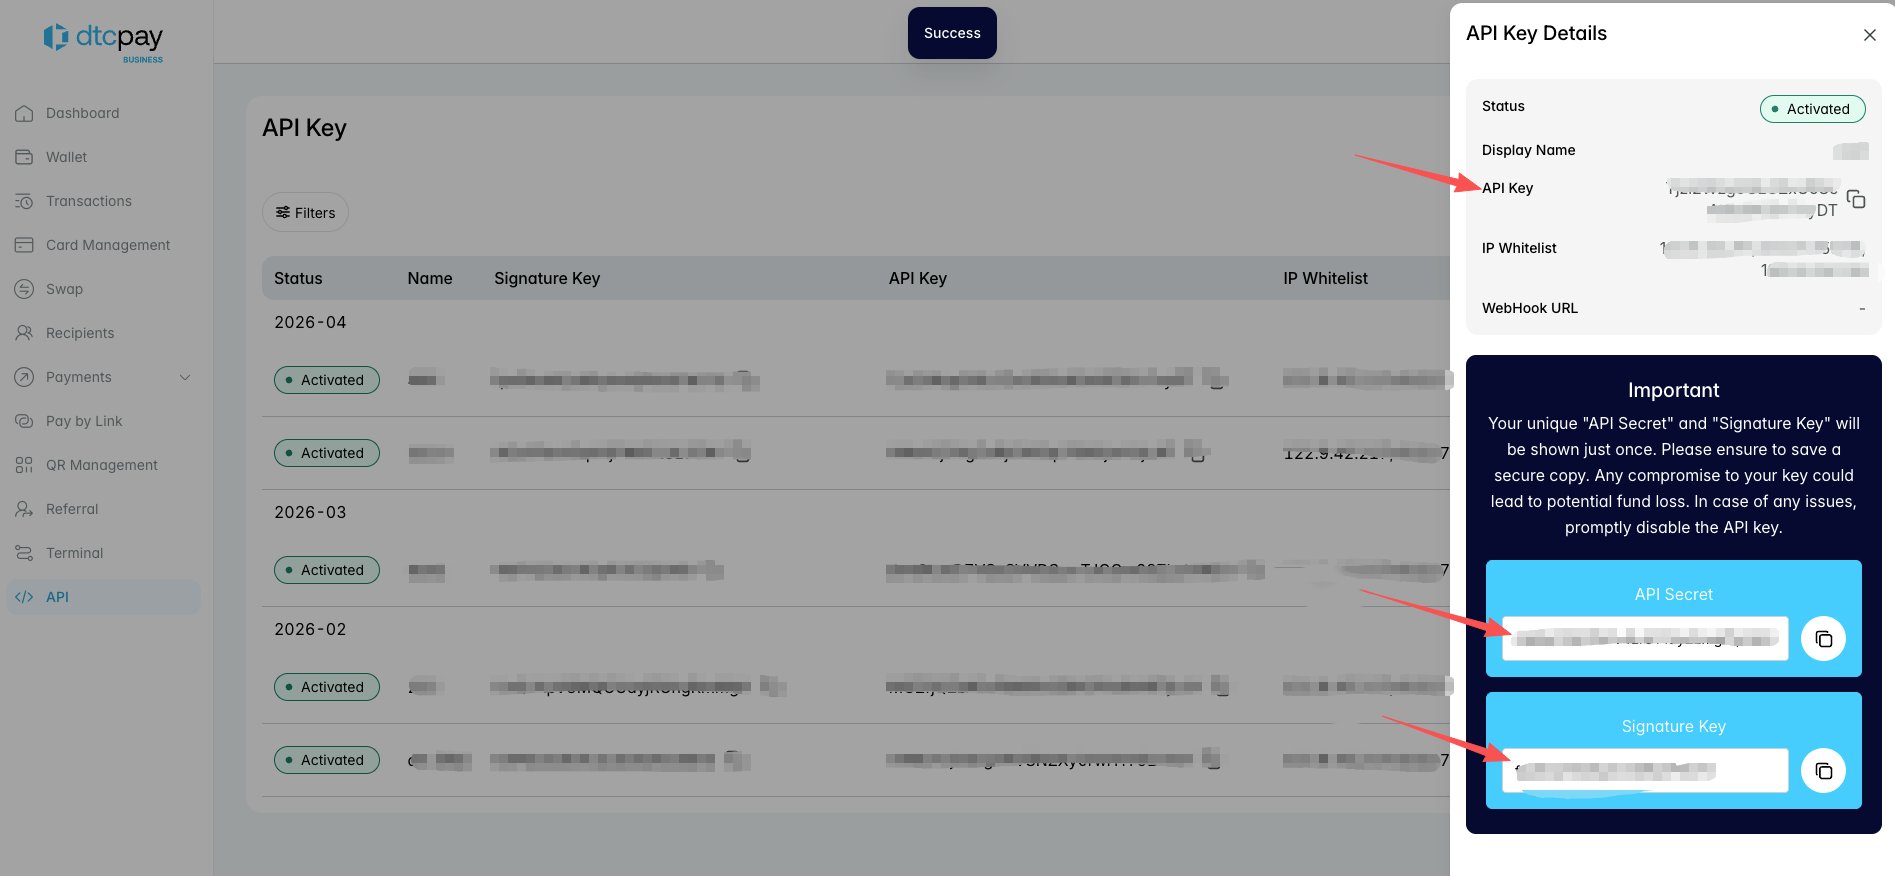
3
Complete System Configuration
Return to this system and enter the generated 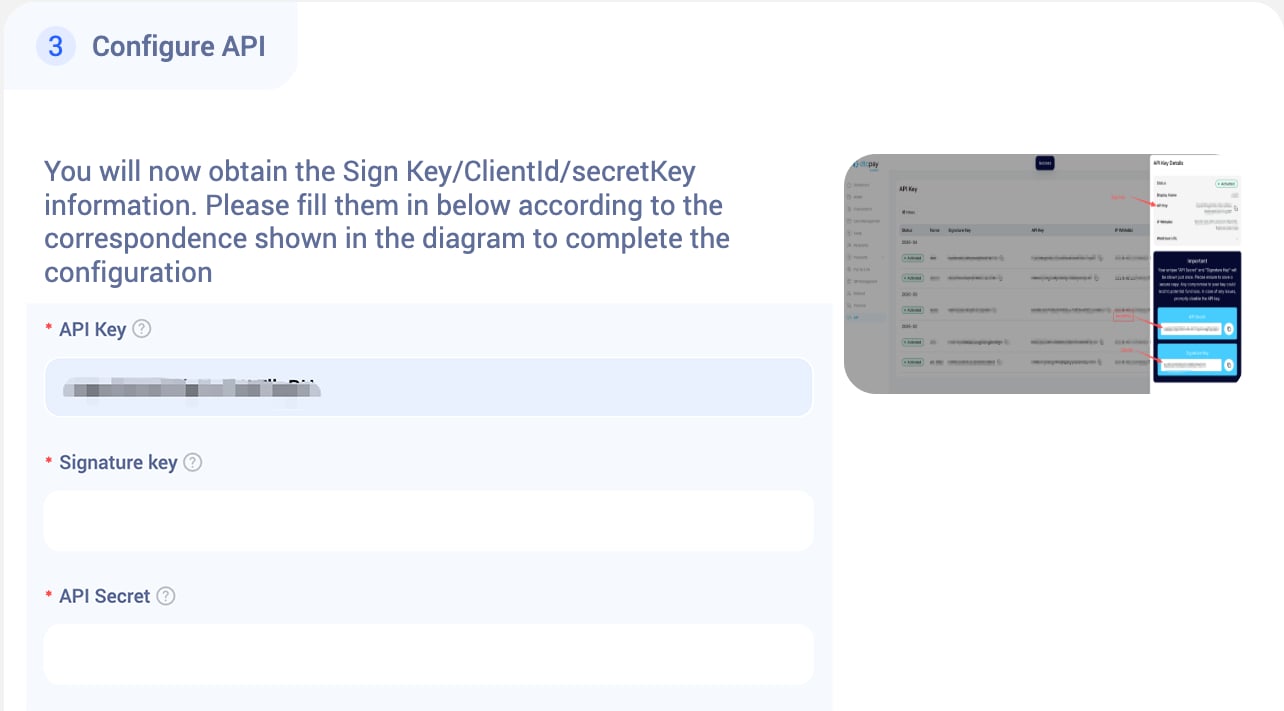
ClientId, SecretKey, and Sign Key into the corresponding fields, then click “Create” to complete the configuration.II. Invite Co-Management Members
To improve team collaboration efficiency, you can add workspace members to the OTC member list for collaborative management.1
View Member List
Click the “Members” button in the upper right corner of the page to expand the current member list.
2
Assign Members
Select the workspace members you want to participate in OTC management from the list.
3
Save Settings
After making adjustments, click the “Confirm” button at the bottom to apply the configuration.

III. Configure OTC Security Policies
The OTC policy engine is used to build a rigorous and customizable risk control framework, supporting both basic policies and advanced policies.Once approval policies are configured, all business scenarios that trigger approvals will strictly enforce the preset rules. The system ensures policy execution integrity at the foundational level, preventing any bypass or malicious tampering.
1. Basic Policies
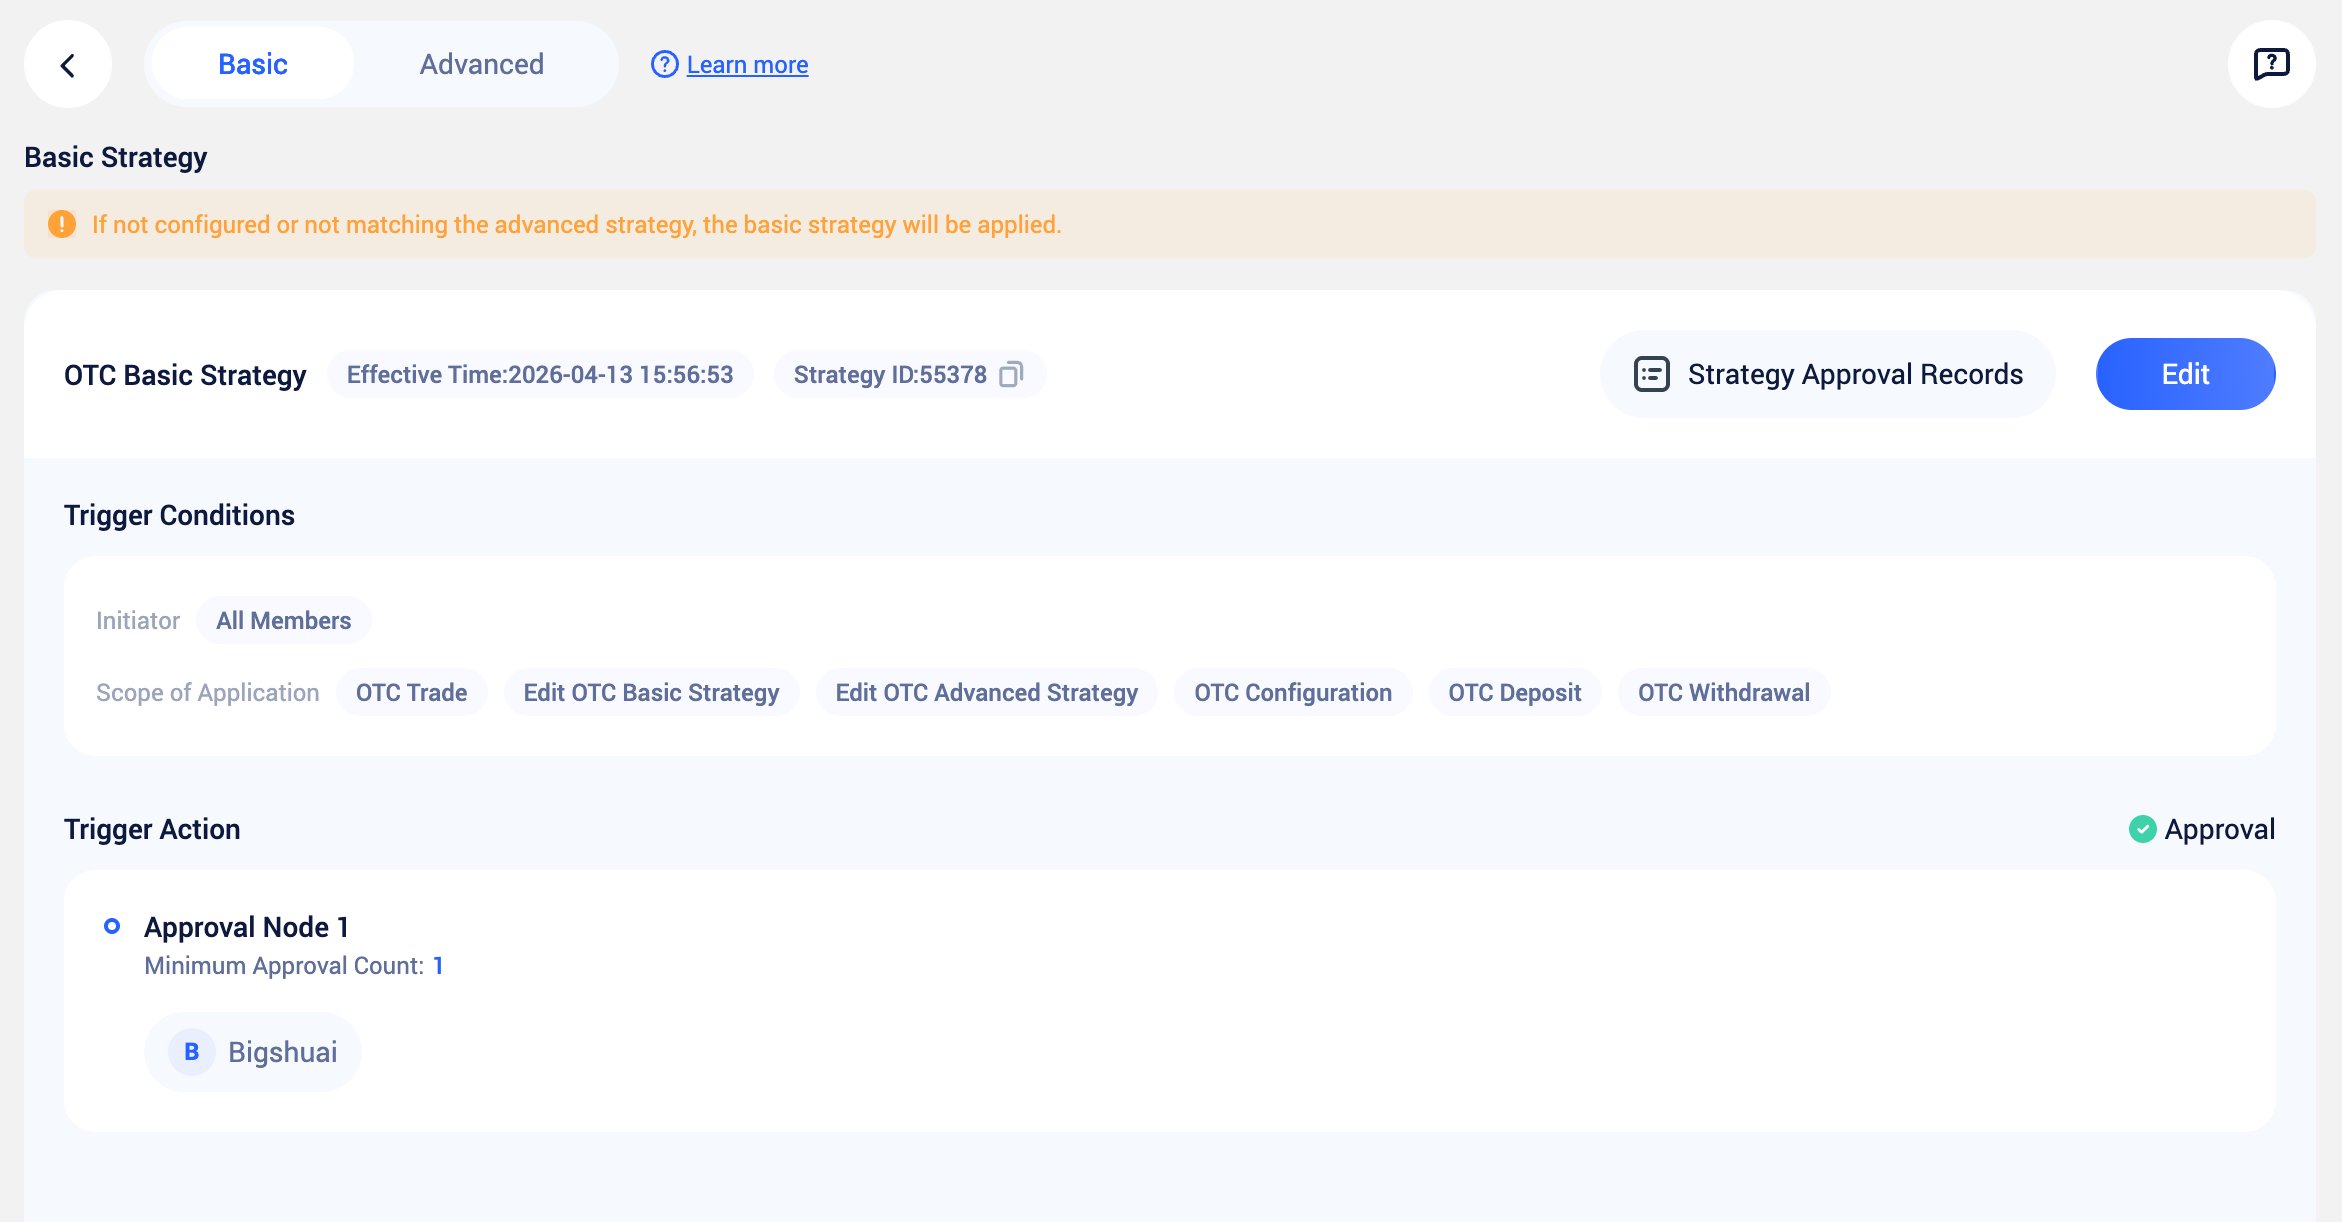
Approval mechanism details:
- Default Configuration: The creator is the approver
- Flexible Adjustment: The final approver can be changed to any OTC member
- Node Management: Supports adding or removing approval nodes — click “Edit” to customize approval paths
- Audit Trail: View all policy changes and approval execution details via “Approval Policy Records”
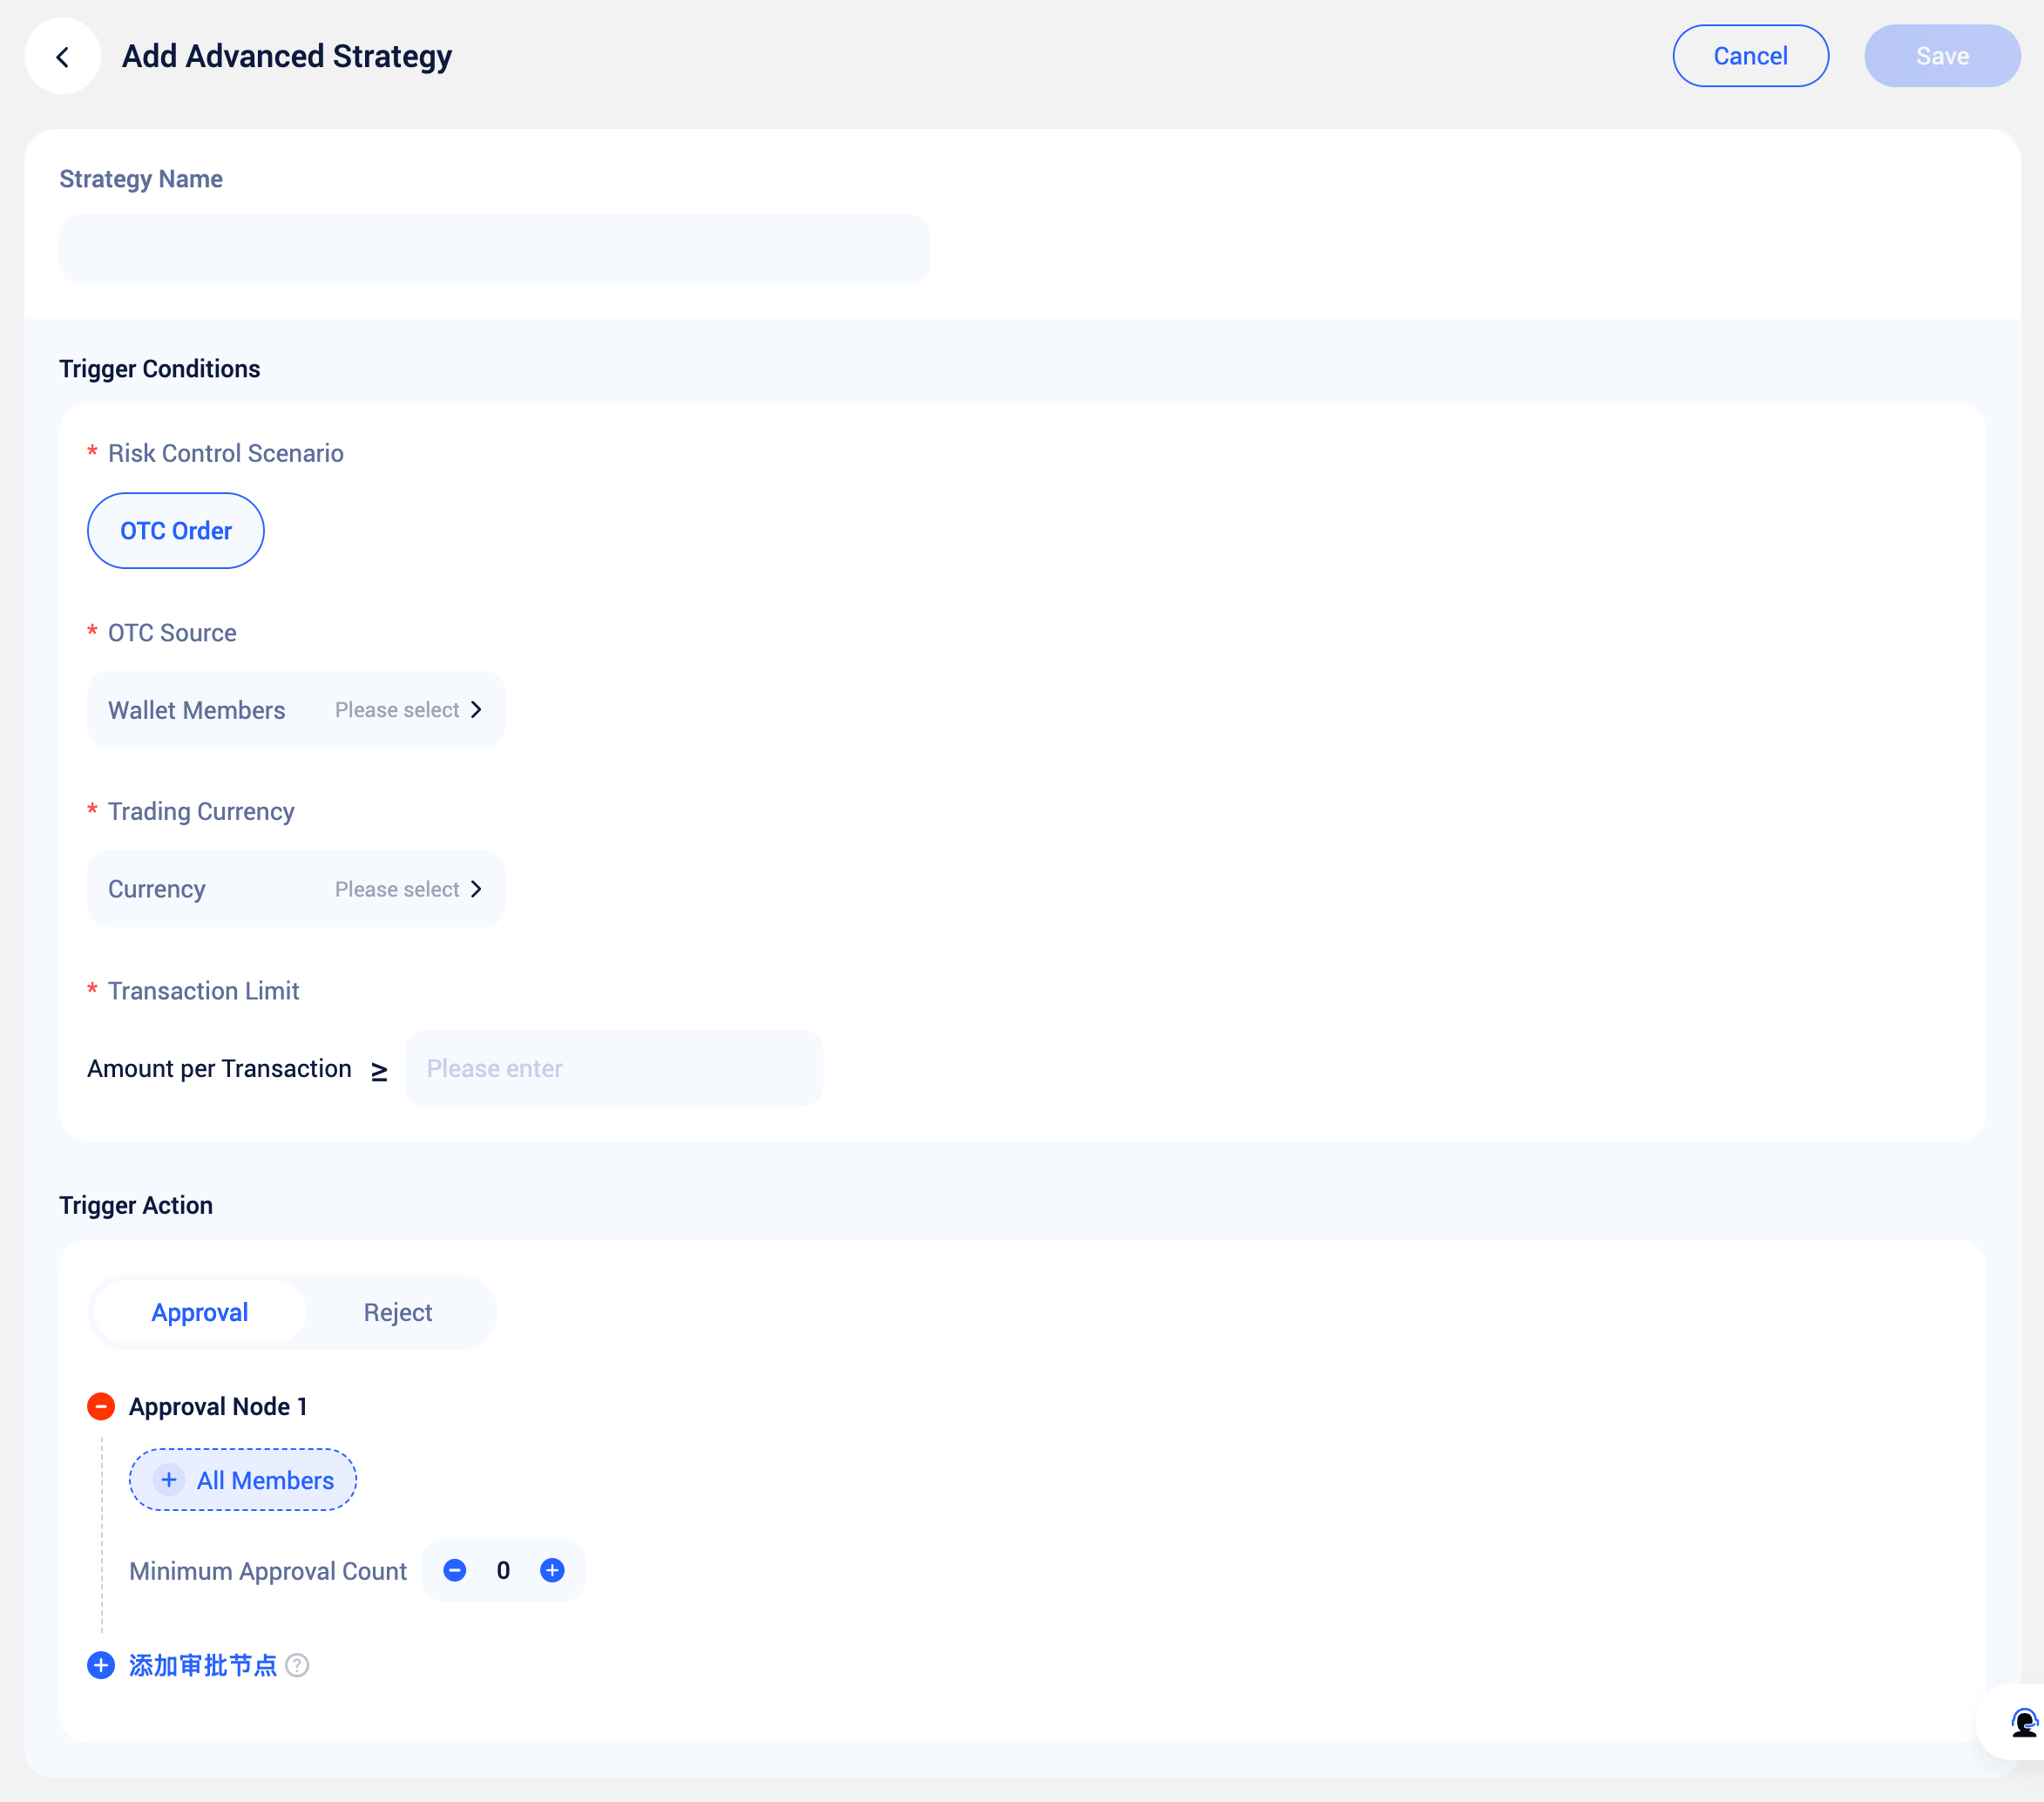
2. Advanced Policies
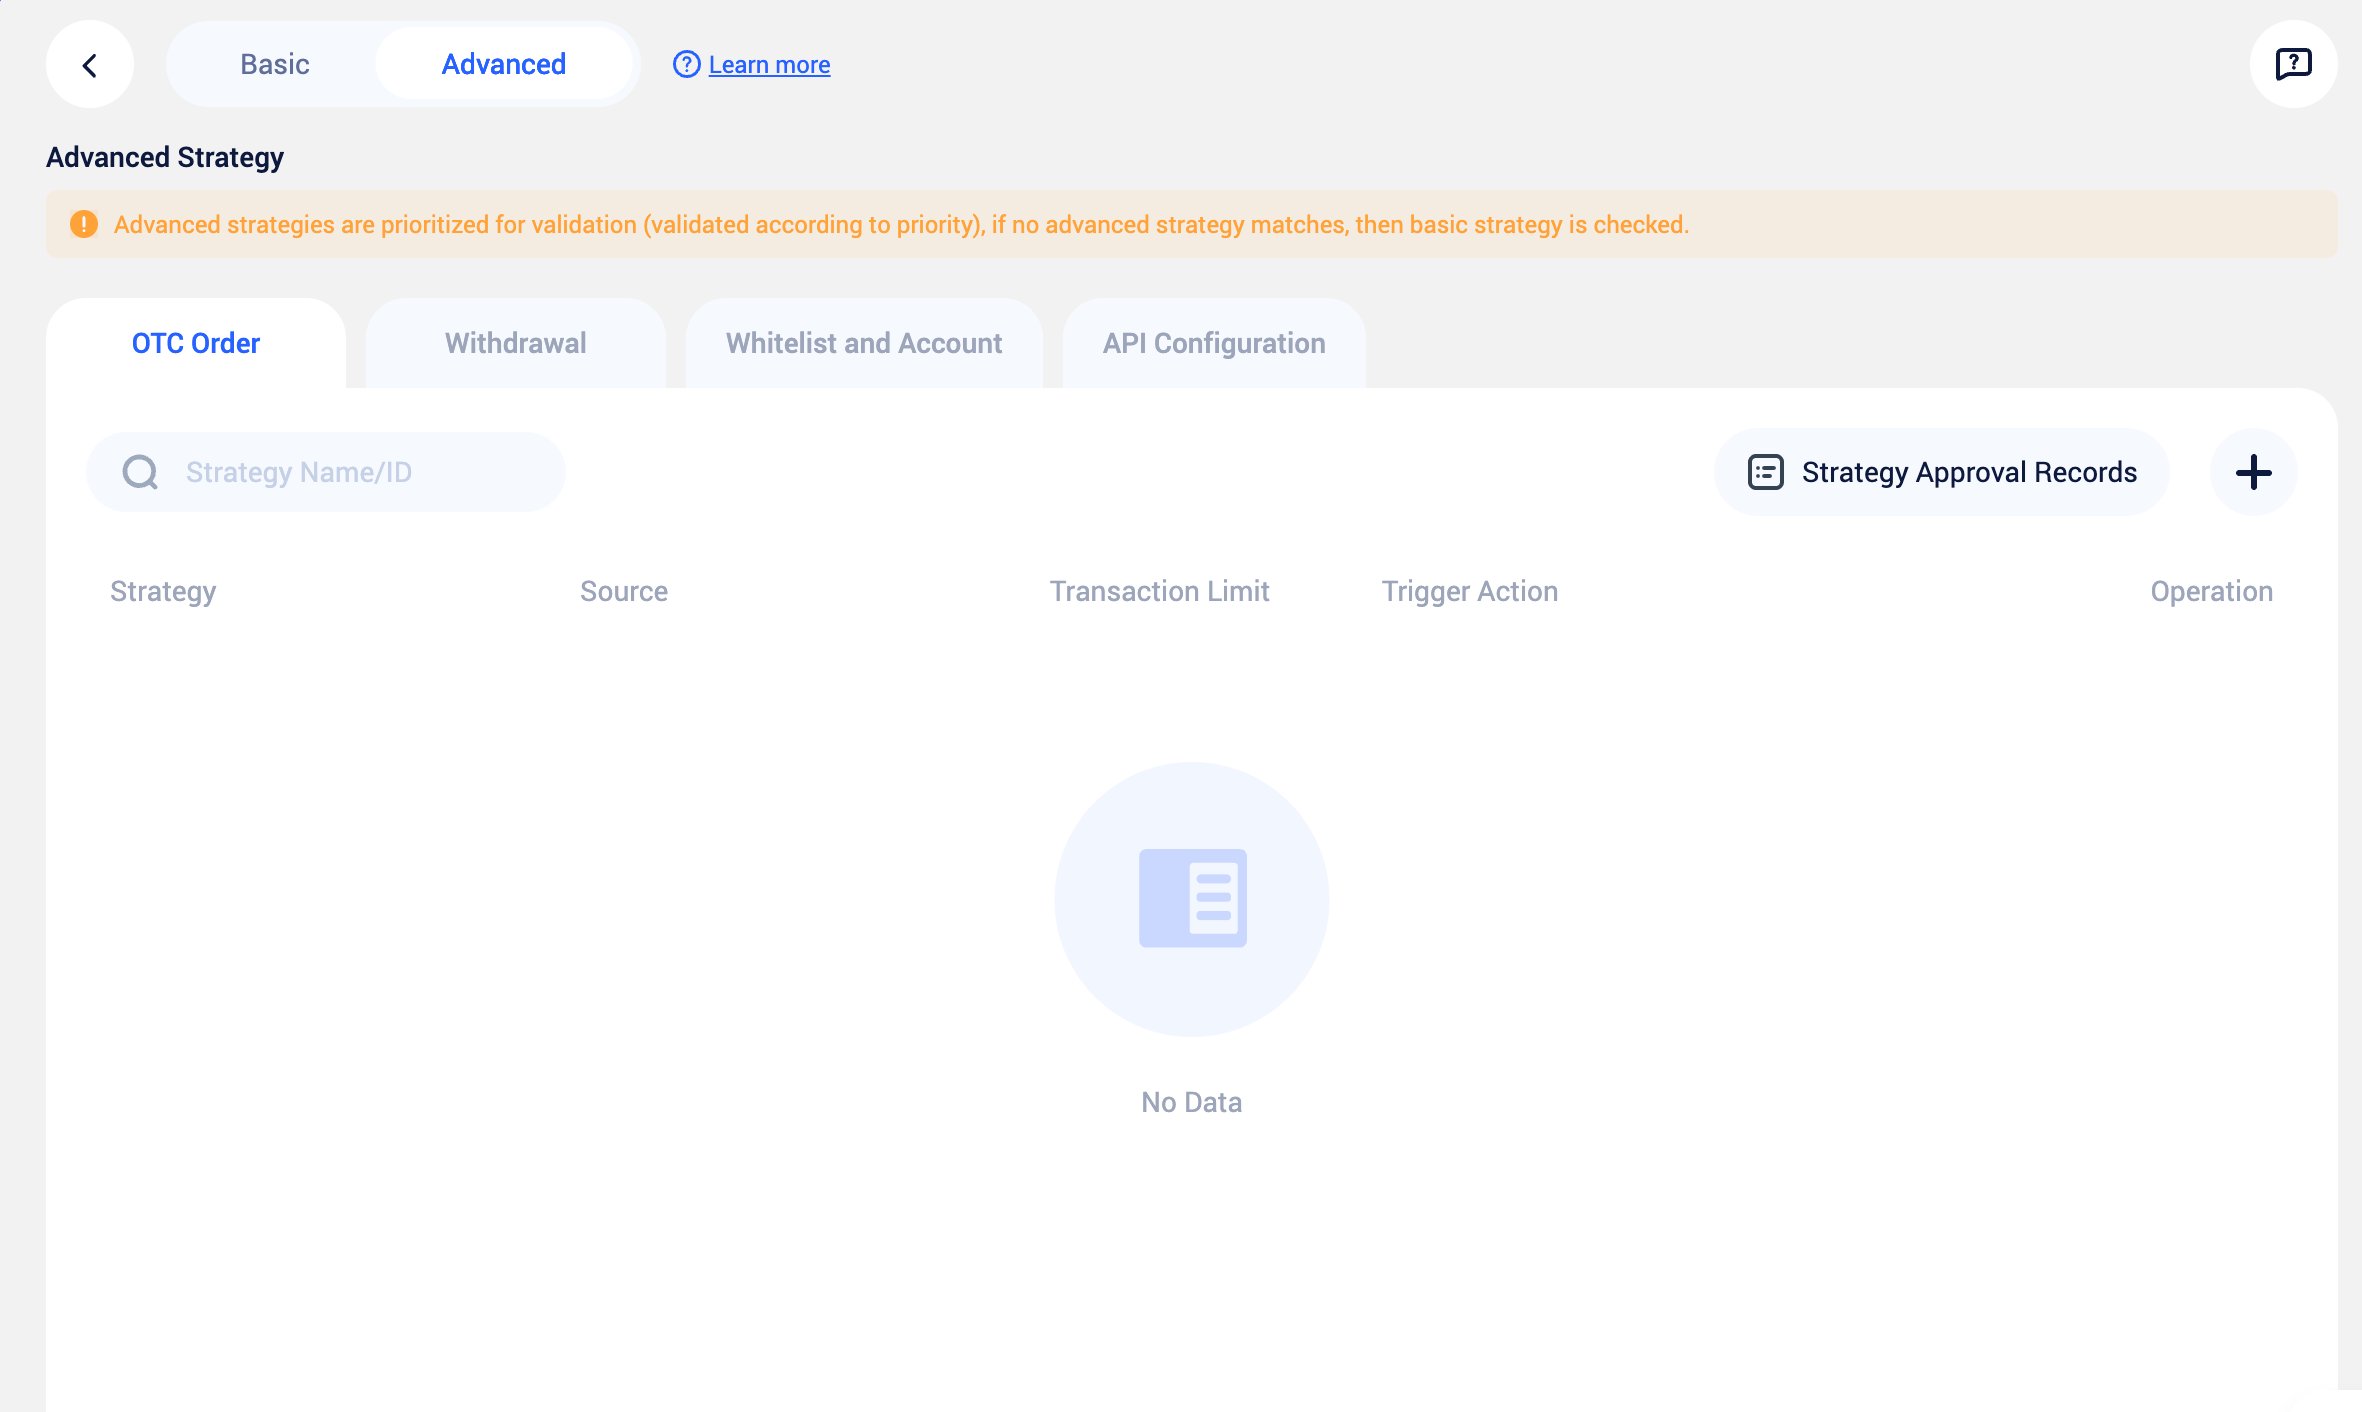
- Priority Matching: The system first checks whether an advanced policy is triggered
- Fallback Mechanism: If no advanced policy is matched, the system automatically falls back to the basic policy
IV. Stablecoin Whitelist & Fiat Account Management
1. Stablecoin Address Whitelist
The stablecoin address whitelist is used to manage and restrict withdrawal addresses, ensuring funds only flow to wallet addresses you control. Configuration steps:1
Add Address
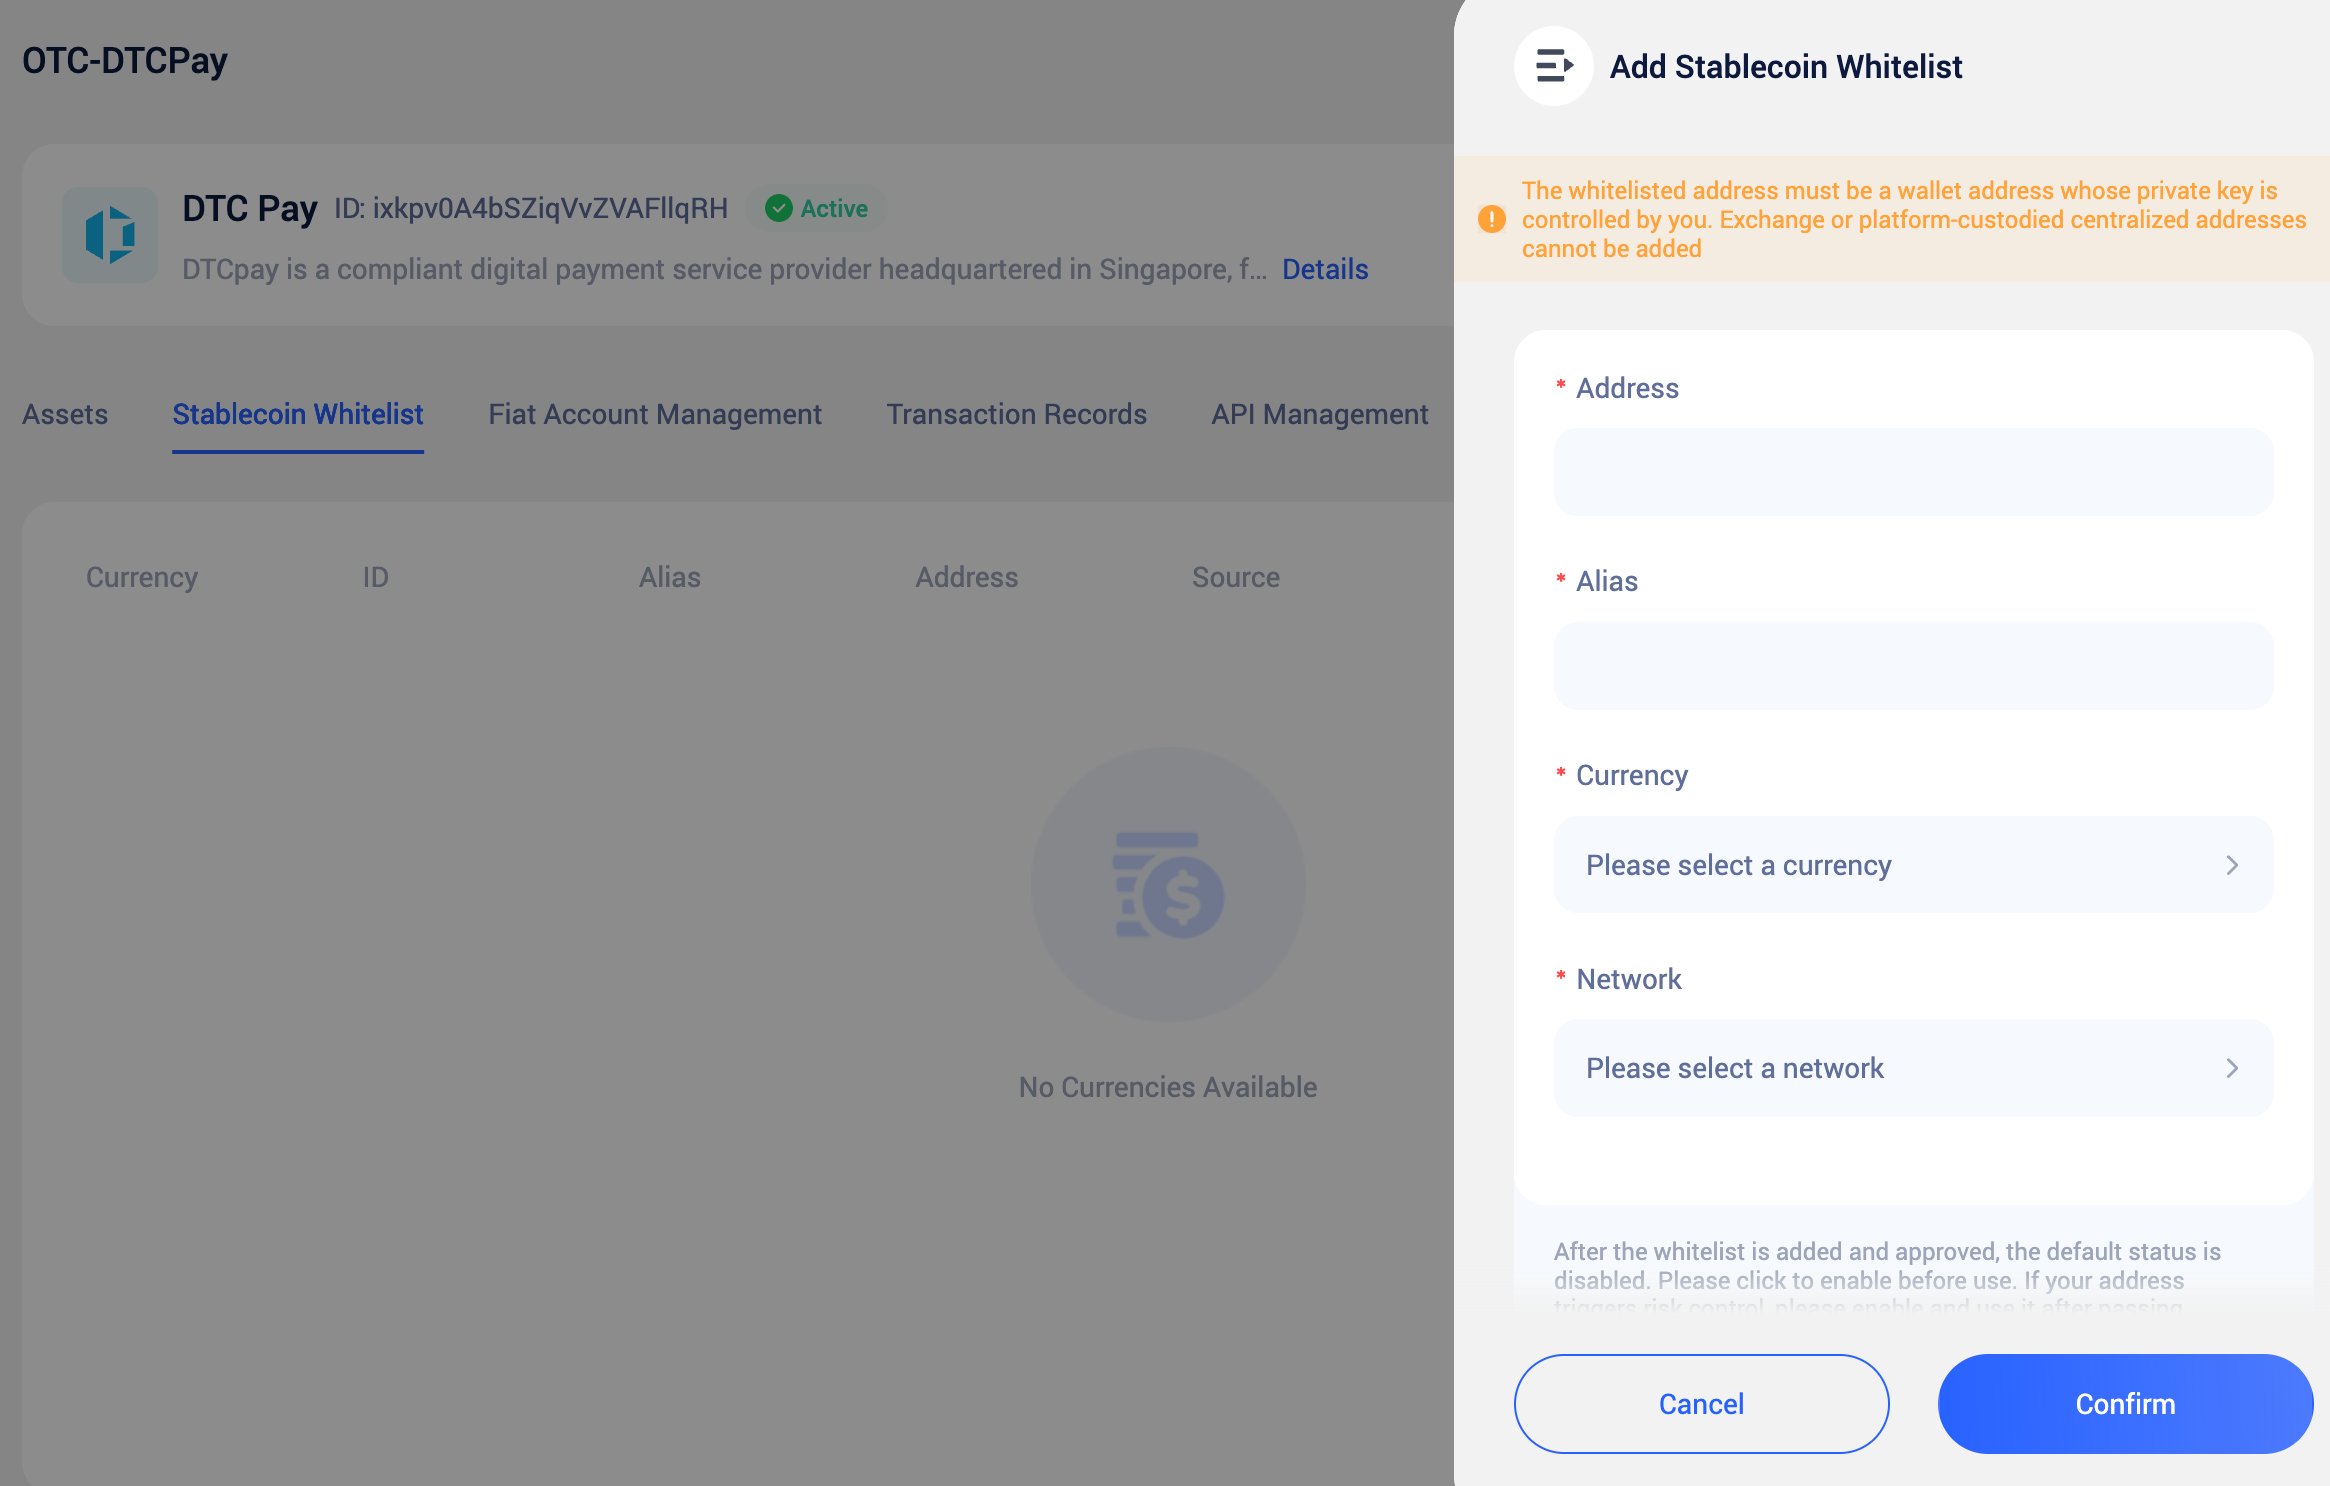
On the stablecoin whitelist page, click “Add”, enter the wallet address, and fill in an address alias (avoid similar names to prevent confusion).
2
Select Network & Currency
Choose the corresponding blockchain network and currency, then click “Confirm” to save.
3
Await Approval & Enable
The addition will trigger a security policy approval. After approval, the address is disabled by default and must be manually enabled before use.
- Small Transfer: Complete a small transfer of the specified amount as prompted
- Verify Address: The transfer must be made from the address that triggered the risk control
- Await Activation: Wait for system verification after the transfer is complete
Verification funds will be fully credited to your DtcPay wallet balance. After verification is passed, the funds can be used normally — no funds will be lost.
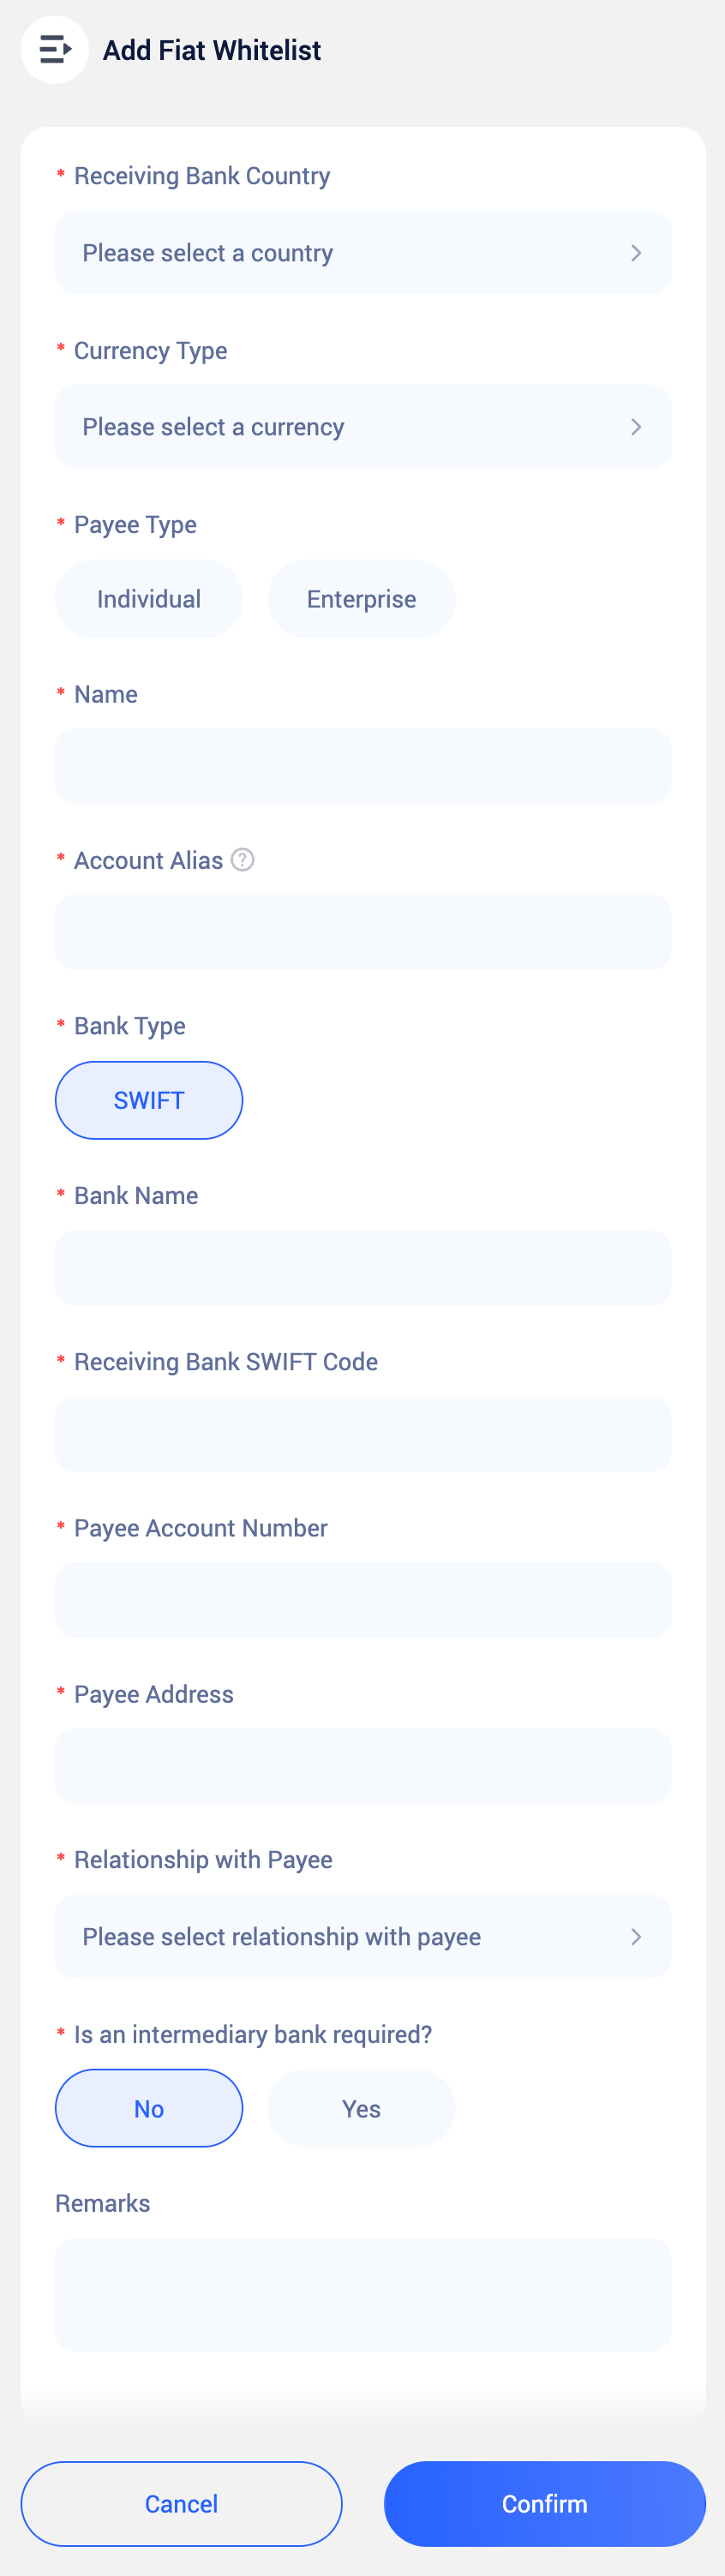
2. Fiat Account Configuration
Fiat accounts are receiving accounts used for fiat withdrawals. You can choose your own account or a third-party account for withdrawal operations. Adding complete account information in advance helps improve efficiency and reduce errors.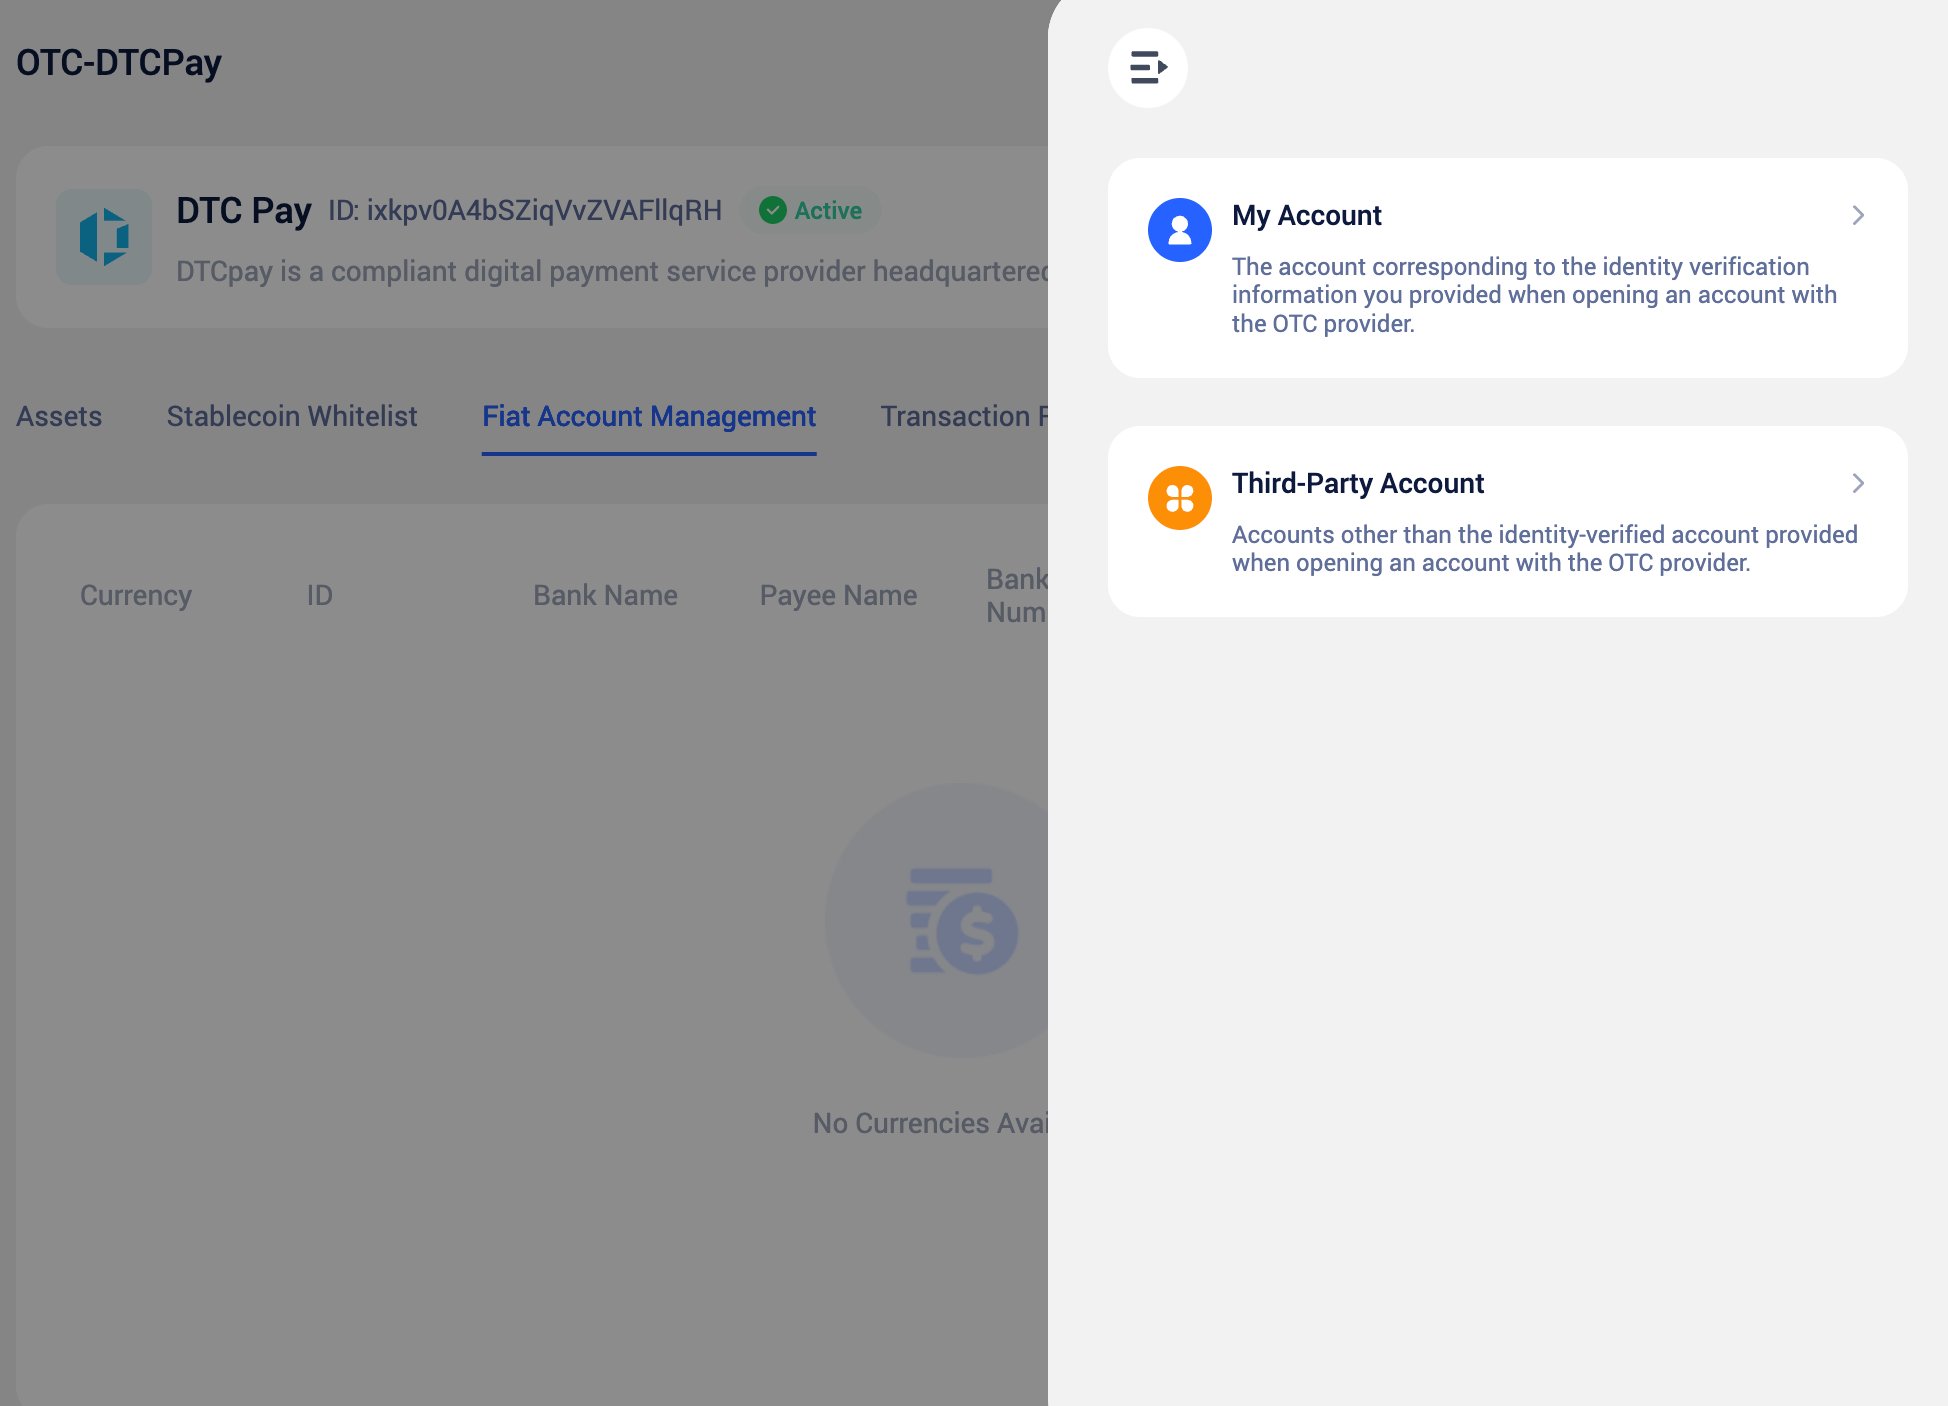
V. Deposits
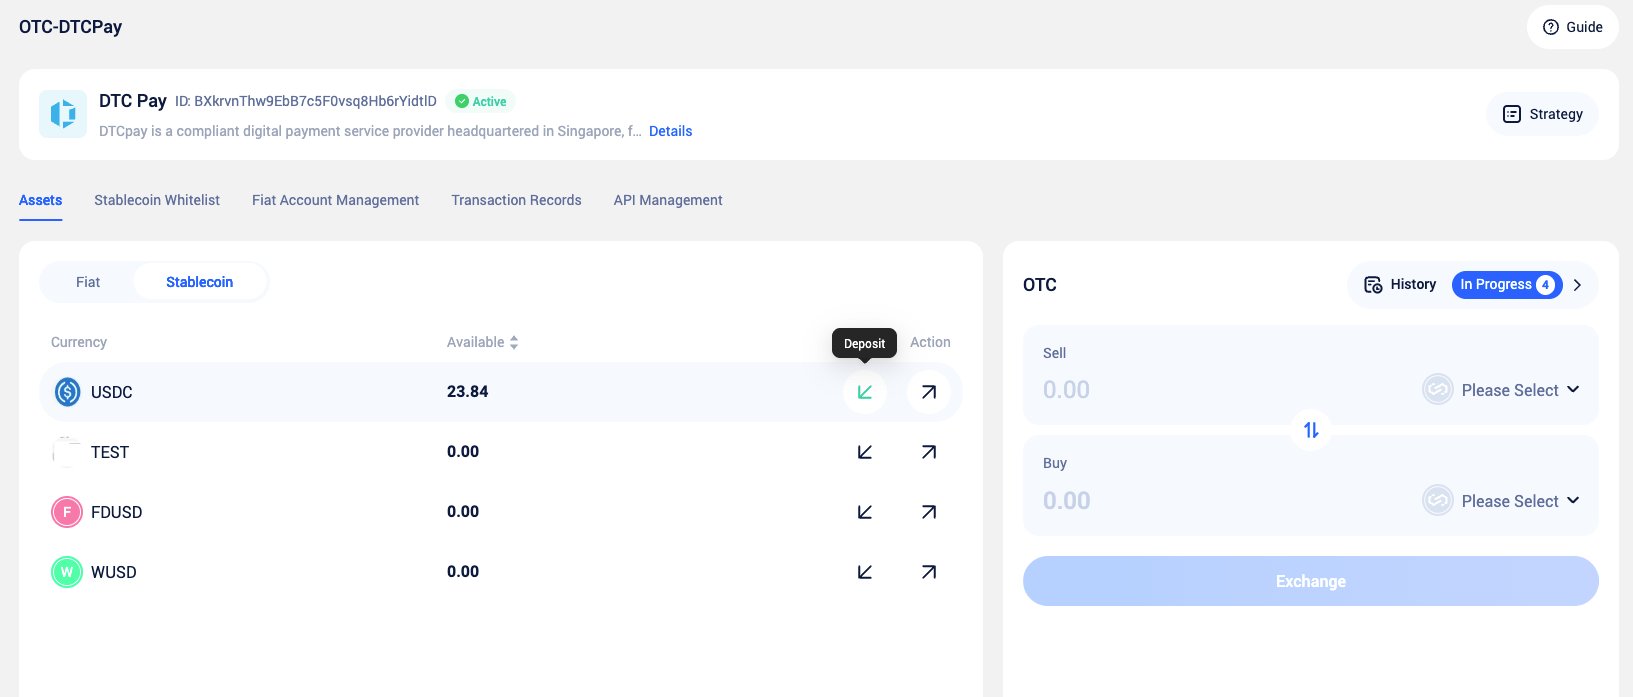
DtcPay operates on a pre-deposit model. Before conducting OTC trades, you must first deposit fiat or stablecoins into the DtcPay designated account for subsequent trade settlement and fund flow. Account balances can be flexibly used based on business needs and can be withdrawn at any time to your bank account or blockchain address for efficient fund scheduling and management.1. Stablecoin Deposits
2. Fiat Deposits
1
Create Order
Select the target fiat currency, click “Deposit” and confirm the order. The system will display the receiving account information.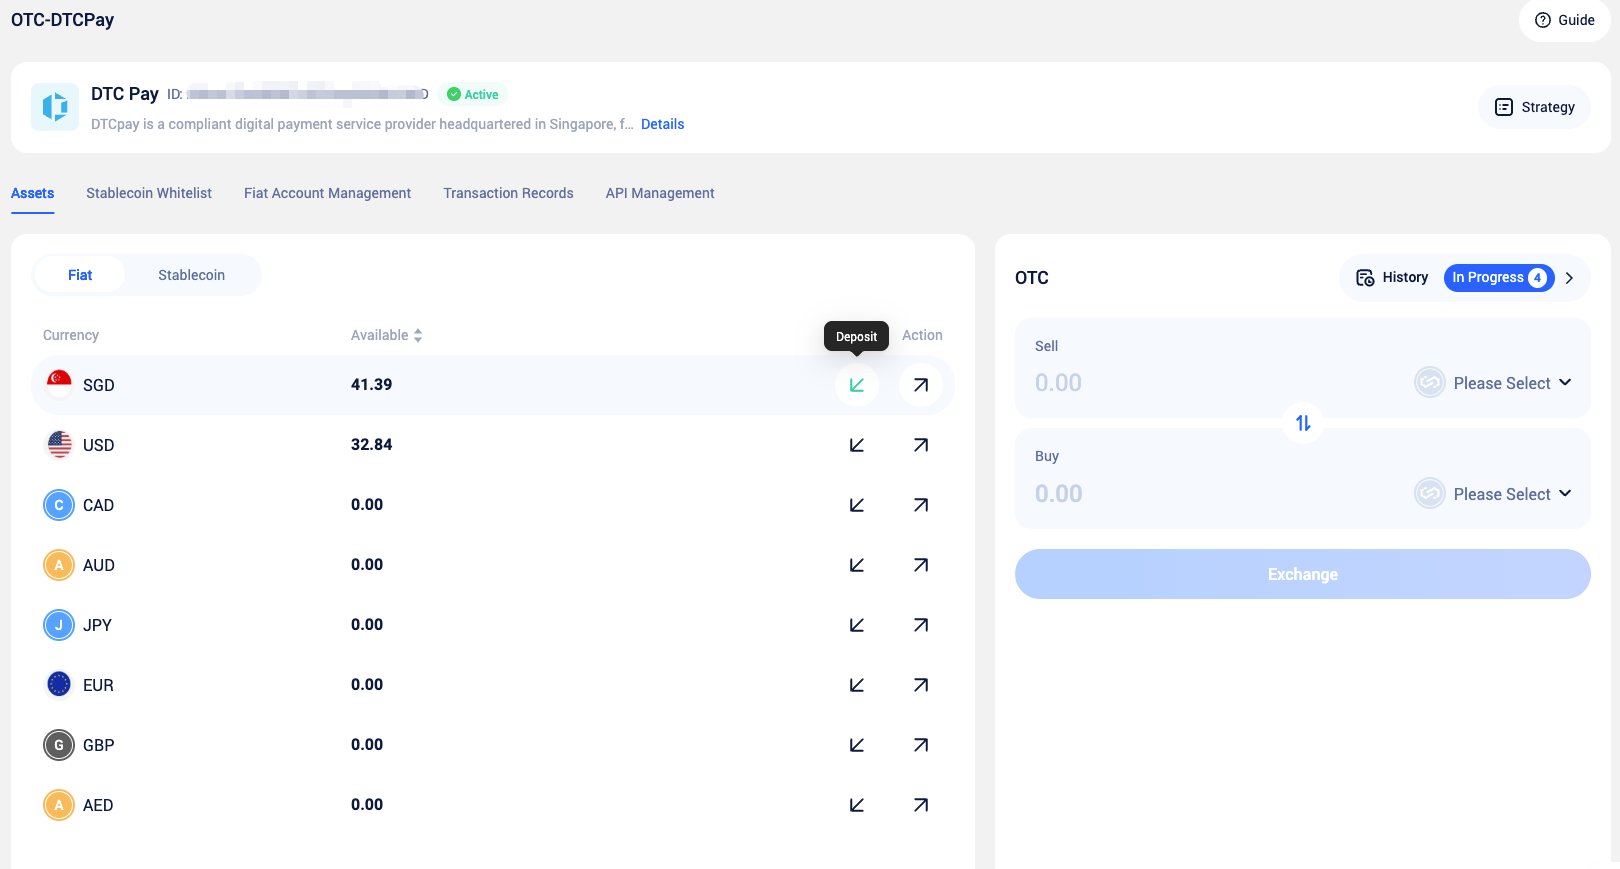
2
Bank Transfer
Complete the bank transfer according to the on-page instructions.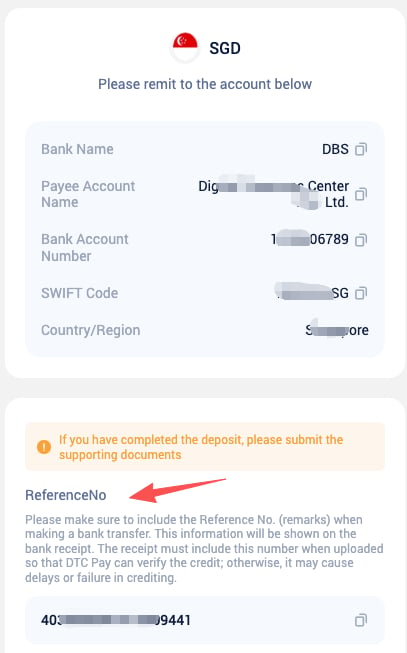
3
Upload Proof
Upload the transfer receipt and enter the actual amount, then submit for review.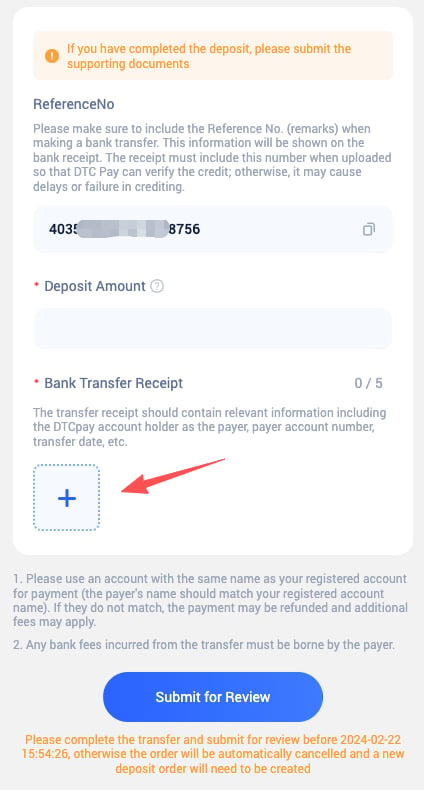
The order must be submitted within 24 hours of creation; otherwise, it will be automatically canceled.
4
Await Credit
After review approval, the funds will be credited to your balance. If funds are not credited for an extended period, please contact DtcPay customer support.
VI. Withdrawals
1. Stablecoin Withdrawal
The withdrawal address must be an address that has been added to the whitelist.
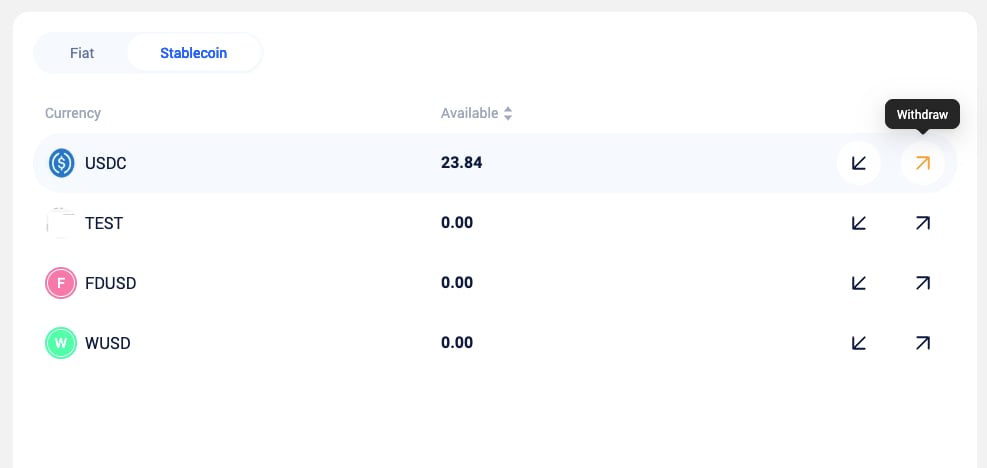
1
Initiate Withdrawal
Click “Withdraw” in the currency list.
2
Fill in Details
Select the network and enter the address and amount.
3
Submit for Approval
Submit the request; it will be executed after approval.
2. Fiat Withdrawal
Supports withdrawal to your registered entity account or a third-party account.Withdrawals to third-party accounts require proof of fund purpose (e.g., invoices, contracts, etc.).
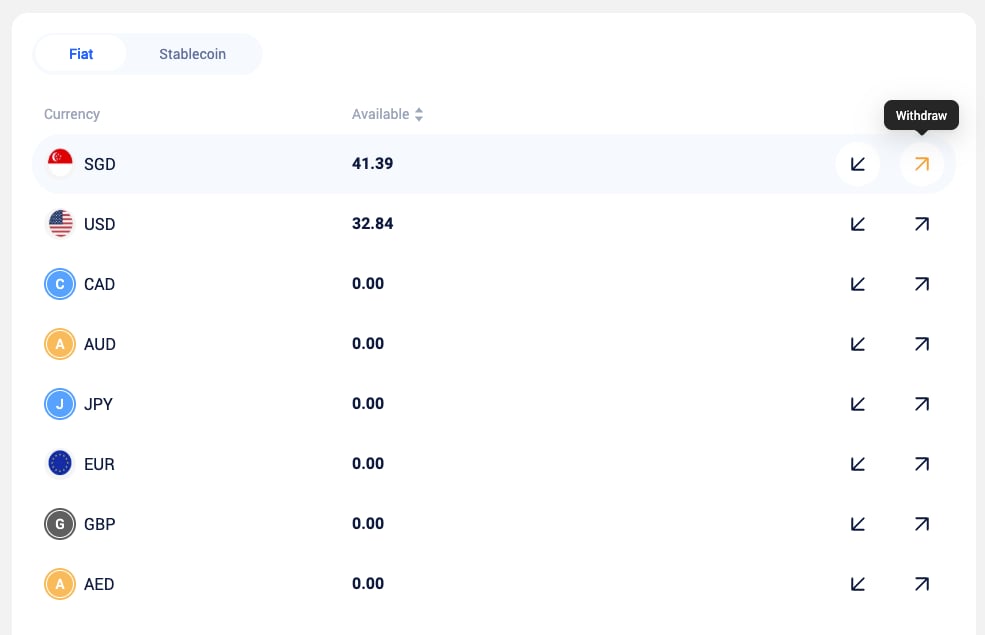
1
Initiate Withdrawal
Click the “Withdraw” button.
2
Fill in Details
Enter account and amount information.
3
Approval & Credit
After approval, DtcPay will process the request. The credit time depends on the bank.
VII. OTC Trading
1. What Is OTC Trading
OTC (over-the-counter) trading allows you to exchange fiat currencies and digital assets directly on the platform at real-time quoted rates.Trades are matched and settled by DtcPay, the OTC service provider, rather than through a public-market order book. On DtcPay, OTC trading is primarily used to exchange fiat currencies for stablecoins or other digital assets. Some trading pairs also support:
- Fiat-to-fiat exchanges
- Stablecoin-to-stablecoin exchanges
Available trading pairs are subject to those displayed in the system.Common examples:
- Buy USDT with fiat currencies such as USD or SGD
- Convert stablecoins such as USDT or USDC into fiat currency
2. How to Make an OTC Trade
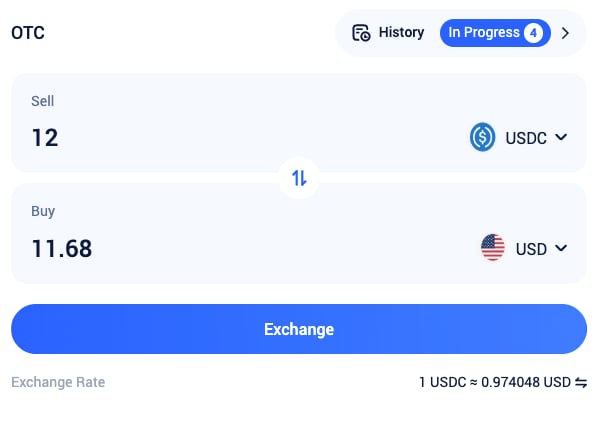
Before initiating an OTC trade, make sure the account used for payment has sufficient funds.If the balance is insufficient, make a deposit first. See the “Fiat Deposits” or “Stablecoin Deposits” section for instructions. Then follow these steps:
1
Select Currencies
Select the currency you want to sell (the payment currency) and the currency you want to receive (the target currency).
2
Enter the Trade Amount
Enter the amount to exchange. The system will display the estimated amount you will receive in real time based on the current quote.
3
Confirm the Trade
Review the trade details and submit the request.
Some trades may require approval and will only be executed after the approval process is complete.
Some trades may require approval and will only be executed after the approval process is complete.
4
Complete the Trade
Once the trade is complete, the system will convert the funds at the final confirmed rate and automatically update your account balance.
Exchange rate: Quotes are valid for a limited time. If the original quote expires before approval is complete, the trade will be executed at the latest available rate.
The final exchange rate is the rate applied when the trade is executed.
VIII. View Records
The records page displays all fund-change-related data, including: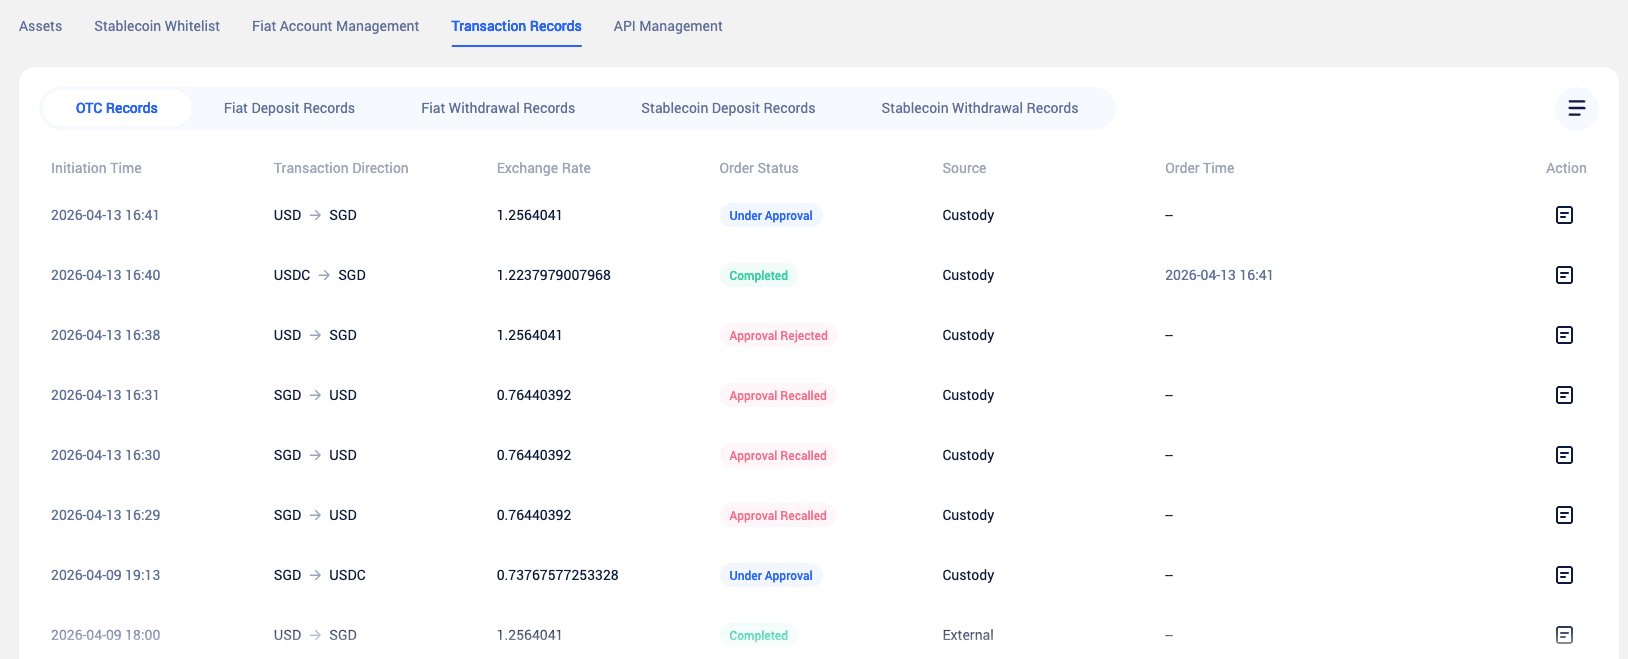
- Deposit records
- Withdrawal records
- OTC trading records
- Non-API-initiated transaction records